
A student recently asked for corrections on some of the basic tai chi moves and poses and I gave them. He came back the following week really deep in his stances ready to show me his progress. I took the wind out of his sails by making more corrections and realized that he spent the weekend on the internet and came back with some very different ideas.
Tai chi moves are the combination of poses and stances, posture alignment, breathing techniques, and martial application. Basic tai chi stance techniques are the foundation for correctly performing the tai chi form for both beginner and advanced practitioners.
There are general things to focus on that improve all the tai chi moves and there are also specific tips and tricks for all of the tai chi poses. Let’s start with tai chi stances technique that anyone at any level can apply to improve their form. Then we will talk about the common tai chi chuan postures and show videos to illustrate the point.
Pro-tip: After learning the tai chi moves, reading about or seeing videos about the movements can make lightbulbs go off as to how you should be moving more correctly. Check out books and resources on the tai chi form that help expand your understanding and knowledge.
Tai Chi Moves Explained
Each of the tai chi poses are surprisingly different and this can sometimes be overwhelming to a beginner. However, there are three things that each tai chi move is intended to improve: 1) health 2) power and 3) agility.
- Health: Tai chi poses maintain open “gates” so that blood can continually flow. This means that no joint is less than 90 degrees. This includes the elbows, knees, and the thigh to stomach (Kua) angle. The armpit is not collapsed. Imagery of holding a soft ball in your armpit helps envision the posture.
- Power: Good posture is key to developing the strength that comes from the tai chi stance. By keeping the head and tailbone aligned, the joints open, and blood flow to the muscle, you can take advantage of all of the mechanical forces to create speed and power.
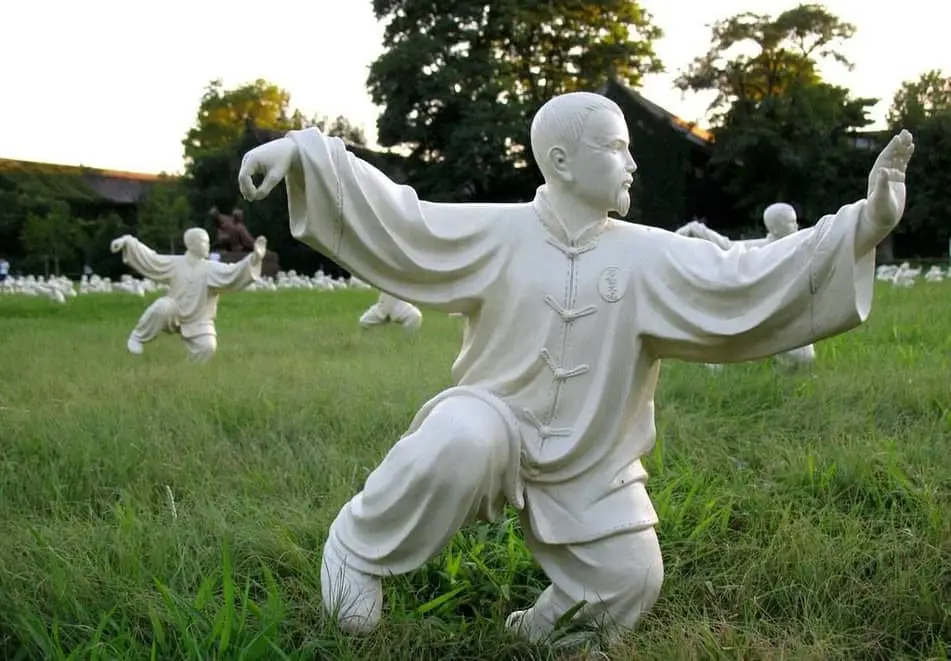
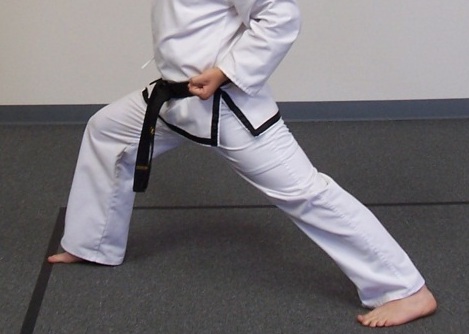
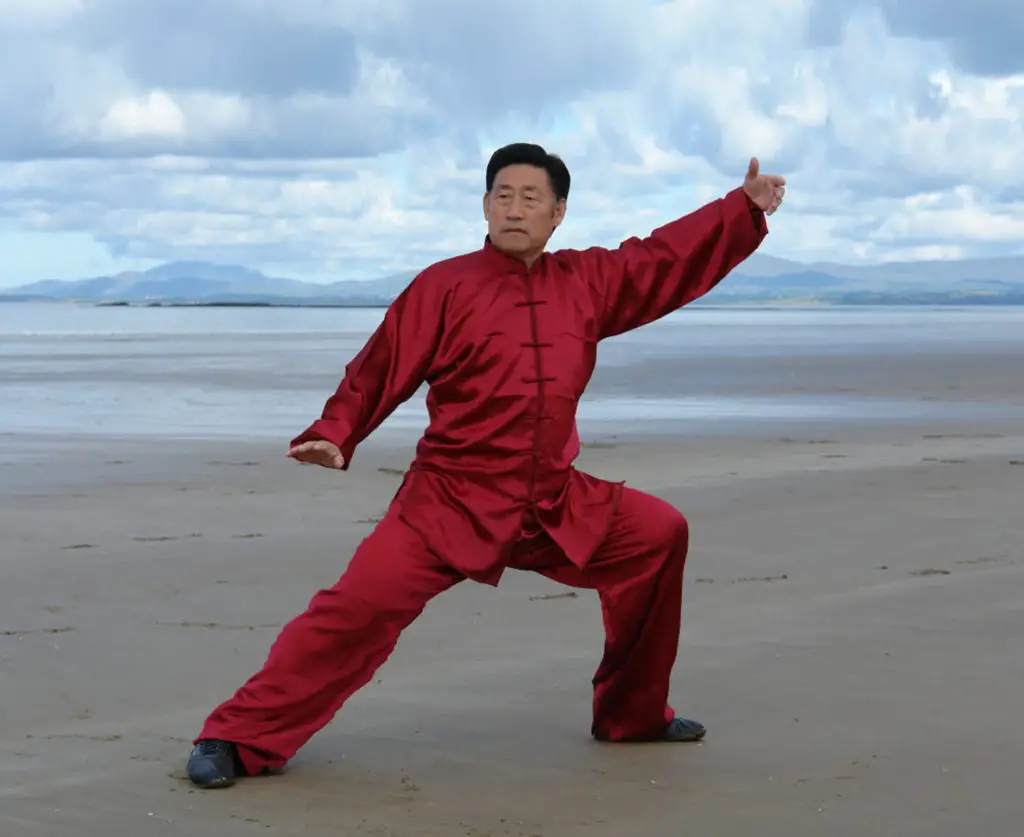
- Agility: Tai chi believes that you would never commit to closing down an arm or leg for some perceived advantage in strength or power. Here is an example. Many karate stances bend the lower back and close down the rear inguinal crease (knee pointed down) in the pursuit of stability and power. Whereas in this frequent example of Chen masters, the soft lower back, open rear inguinal crease (knee pointed out), and flexed knees provide stability and agility.
Tai Chi Poses for Balance
Balance in tai chi stances is a kind of final exam that your posture is great and that when you are stepping you are not landing with your weight on the step but are stepping out first and then transferring your weight in what is known as an “empty step.”
Great tai chi poses for balance are any move where you are transitioning forward or backward and tai chi poses where you are on one foot such as White Crane Spreads Wings. I want to be clear here: tai chi helps you improve your balance because it gives you way to practice proper alignment and proper stepping. Once you have it down in the form, it is easy to work into your daily walking and moving.
How to use the tai chi poses for balance improvements
- Soften your lower back. if your lower back is rounded in, your pelvis will be locked in place and you will wiggle a lot when you come up on one foot so that you don’t fall over.
- Don’t be afraid to keep the toe of the other foot on the ground while you are learning to hold a soft lower back. Modifying the form this way is much better than standing on one leg while you wobble back and forth.
- Always push up from the heal through the crown of the head.
- When stepping, sink on the heavy leg and step out with ZERO weight. Then transfer your weight onto the foot you just stepped with. When done correctly, it feels like you are walking on ice and testing the strength before moving forward. When done incorrectly, you fall with your weight on the foot you just stepped with.
Tai Chi Stances Techniques
There are a couple easy to apply techniques that can make any tai chi stance look 100% better and feel 1000% better when you are moving. These techniques are true for every stance and movement, regardless of your level. Tai chi chuan postures are a great place to practice these because we are still and can think about them and make corrections. Then, you are able to incorporate them into your tai chi moves.
1. Push up from the crown of the head and pull down from the tailbone
This tai chi stance technique is of ultimate importance because it affects how you move, feel, and most importantly to what degree you get health benefits out of doing the form. I think this technique is way better than trying to “stand upright” or “improve your posture.” Those two suggestions are hard to do and don’t get the expansion of the spine that is needed.
The old saying refers to a needle through a ball of cotton. The needle is your spine through the crown of your head and the cotton is your torso. Some of us are a bit fluffier than others but you get the picture :).
2. Keep you armpits soft
The best way to visualize this is to imagine that you have to do the form or hold a tai chi pose with two racquetballs in your armpits. The armpits should never collapse and here’s why: you have huge veins that run through there and if you close your armpits you restrict blood flow. Also, in martial grappling your arm can get locked against your body and you can’t use your arm muscles effectively if you armpit is closed.
3. Don’t have a collapsed shelf – Ta Dang
Do you want rapid progress with your tai chi poses? Do you want to rapidly size-up an opponent or teacher’s abilities? An understanding of Ta Dang is essential. Ta Dang refers to a braking of the arch that runs from the inside of one leg to the other. If you pretended to sit on a stool with good posture you would not have a collapsed shelf (Ta Dang). This arch is responsible for all of your power and agility. Trust in your alignment and strength also leads to the depth of your tai chi postures. Perfect alignment can always be maintained if: the angle of the stomach to thigh is never smaller than 90 degrees and if the inguinal creases (kuas) are open. Back to the pictures above. Notice how in the common karate posture. the rear thigh and knee are pointing to the ground and Chen Xiaowang’s rear thigh and knee are pointed out and the crotch is open on both sides. Hao Dang – Good Dang
This is where the argument begins: “well maybe the styles are different” or “maybe their purposes are different.” Nine times out of ten I think it is poor transmission of ideas. For example, Aikido practitioners are notorious for an inverted lower back and rear posted leg. However, can you find a picture or video of Ueshiba locked or extended? He would take a knee before breaking this posture.
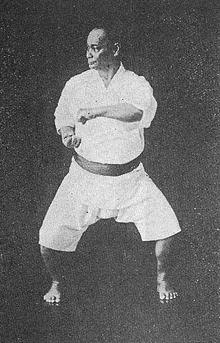
And what about Karate? Pictures of Itosu, Kyan, Motobu, Nagamine, Kanai Uechi, you name it, all have open kuas (inguinal creases) where the gi or pants don’t obscure the posture.
There definitely is some martial use for locking the back leg, closing the rear inguinal crease, and rounding the lower back in. If are training a new practitioner who has to learn how to fight quickly, there is great stability in this stance. However, ALL movement is restricted and if you get to their side, they can’t defend your movements. So is the quindecinnial karate stance a benefit or just an artifact of having to train farmers to fight with just a few months notice? Either way, it does not promote blood flow so it has limited health implications and is something that is trained out of higher level practitioners of every art. So why start with something you have to correct later?
4. Have your stance height match your ability
We all want deep beautiful stances. However, you are not flexible enough, stable enough, or balanced enough, you will compromise your posture to get lower. It is better to be in a proper higher stance than a lower one which will pay off sooner than you think. Here is the truth: learn to do the proper stance with the three techniques above, then you will be able to sink lower correctly.
A lower tai chi stance is developed by perfecting your posture and then allowing your body to sink.
A tai chi stance, like the form, can be performed at three heights; low, medium, and high. Height depends on flexibility or how warmed up you are. You do not get a lower stance in tai chi from going lower. A lower stance is developed by perfecting your posture and then allowing your body to sink. You gain depth not by leaning over or closing your hip but by sliding your feet our further with the spine aligned. Note that it is not an all-or-none scenario. Despite having practices tai chi for 2 decades, I still do high stances if I am not warmed up, have not been practicing for a while, or if my energy is low.
How many tai chi poses are there?
There are anywhere from 8 to 108 tai chi poses depending on the style of tai chi you are studying and the length of the form. Truth be told, there are many repetitions of the tai chi moves in the 108 move form so they are not all considered different but there are still 108 moves.
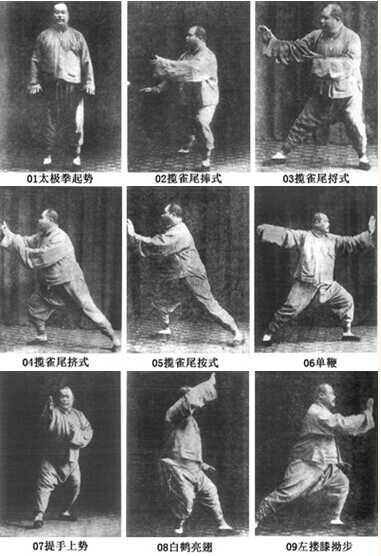
As an example, here are the yang tai chi 13 postures
- Opening Movement
- Cloud Hands
- Single Whip
- Fist Under Elbow
- White Crane Spreads Wings
- Brush Left Knee and Push
- Hand Strums the Lute
- High Pat to Horse with Palm Thrust
- Turn Body and Chop with Fist
- Step Forward, Parry Block and Punch
- Grasp Bird’s Tail
- Cross Hands
- Closing Movement
I love these old photographs! They must have been so excited when the camera was invented and they could finally capture the tai chi moves from their teachings. There are arguments to be made for learning a short form and a long form. If you are trying to choose between the two, find out why a short form might be beneficial or why a long form might be worth the time learning.
A Focus on the Basic Tai Chi Moves for Beginners and Seniors
I want to conclude with talking specifically about some of the beginner tai chi poses to understand what they should be paying attention to. It is also to talk about some of the tai chi poses for seniors to know what is important so that they can modify what they are doing to be in a higher stance or even seated in some instances.
When looking around the internet it is hard to know what is correct and what is important. So I have gathered a bunch of images and video here and linked back out to give credit. Let’s start with the tai chi bow stance.
Tai Chi Bow Stance
The tai chi bow stance is an obvious 30/70 stance is a combination of a front and horse stance. The forward knee cannot 1) cross the toe, 2) pitch inward, or 3) pitch outward. Beginners and seniors should concentrate on not bending forward and not having the knee in front of the toe.

Tai Chi Empty Stance
A tai chi empty stance is a higher stance and is used to transition between tai chi moves. The weight is distributed about 70/30, the knees stay in alignment with the toes, the lower back remains soft, and maintain a natural arch to your crotch – the Ta Dang from above. This is a great tai chi pose for seniors and beginners because you can learn the coordination without having to focus on too many arm movements.

Tai Chi Horse Stance
The tai chi horse stance is a forward facing stance with the weight distributed 50/50. The distance can be wider which makes you lower. Toes are pointed out slightly with the weight on the heals. Knees are pointed out, chest posture is up and proud and the lower back is soft.

Opening Tai Chi Moves
In proper tai chi philosophical fashion, I want to end with the beginning! I have also included the longest video here below which you can watch for the first few minutes. It is a very detailed explanation of opening tai chi moves. I find it fascinating that with as different as all the styles are, with having so many different forms, the tai chi open moves of most forms are identical.
What you should get from this is that these moves are extremely important because they have not altered them much and have keep them as the very first thing you do. This includes stepping out to the left, raising both hands and sinking them back down, and transitioning into the next move. Weight is 50/50, inhale as the hands rise and exhale as they fall. Keep your posture upright and extend out through the fingertips.

Know that all of the movements of tai chi theory are described in the Song of 13 Tai Chi Postures. This is a combination of the Eight Energies of Tai Chi and the Five Primary Movements.
Additional Reading: Tai Chi Stretching – The Unknown and Hidden Health Benefits
Thank You!
Glad you enjoyed it. Many more to come.
I just received advice from ellen asst to Mr.Hong-Chi Xiao whose exercise I have been doing for 7 years- Ihave a problem with my ballance so ellen advised me to do “Horse Stance” so I’m on my computer seeing & doing the same
The horse stance can definitely help to improve balance. Achieving a correct stance might take some personal correction but here are some general tips. You want to begin higher and not have a deep posture as a main goal at the beginning. You want to sink evenly into both legs while 1) your upper body is straight and 2) you maintain movement in the pelvis. Do not lock your pelvis by tilting it forward. Your legs should get heavy, tired, and start to burn a bit. Practicing a great posture for 3 minutes is better than a mediocre posture for 10 minutes. The overall sensation that you want to feel is that your upper body is light and your lower body is heavy.
If you are focusing on balance you want to eventually move with this sensation of heavy-low, light-above. Come out of the horse stance and try to move the heaviness from one leg into the other and now pick up the light leg. Put the leg back down and try to move the heaviness into that leg and pick the other leg up. Do not let the weight/heaviness travel into the upper body.